How to Migrate Data from QuickBooks Online to Wesley

To migrate your data to Wesley, you will need two specific files: the Chart of Accounts and the Journal. Please ensure you have both ready before beginning the import process.
Note: For instructions on migrating from QuickBooks Desktop, click here.
If there is an issue loading image, click here.
Step 1: Export the Chart of Accounts
First, ensure that Account Numbers are enabled in your QuickBooks settings so Wesley can map your data accurately.
-
Go to Settings ⚙️ > Chart of Accounts.
-
Click the Run Report button.
-
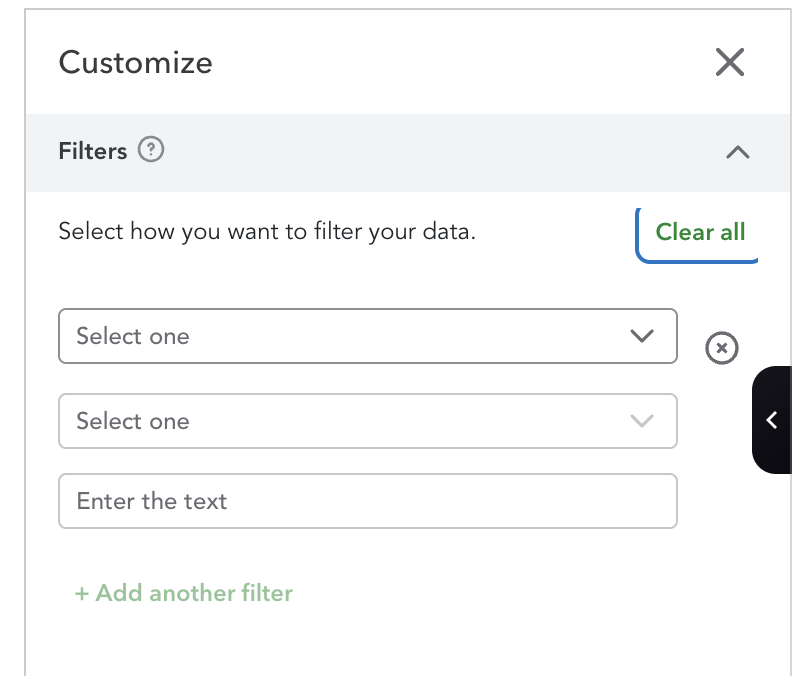
Click Customize button
-
Clear all filters
-
Click the Columns icon and ensure the following are selected:
-
Account, Full Name, Type, Detail Type, Description, Total Balance, and Account Name.
-
Please ensure all accounts, including inactive, are shown
-
Click the Export icon and select Export to CSV.
While we recommend turning on account numbers in QuickBooks, don't worry if you haven't set them up. If account numbers are missing, Wesley will automatically generate and assign them for you during the import.
Step 2: Export Journal File
The Journal is the most critical file for ensuring your data moves correctly.
-
Go to Reports > Standard Report > Journal.
-
On the Customize section, ensure the
Distribution accountandAdjColumns are included. Full Columns: Transaction date, Transaction type, Num, Name, Memo/Description, Full name, Debit, Credit, Distribution Account, Adj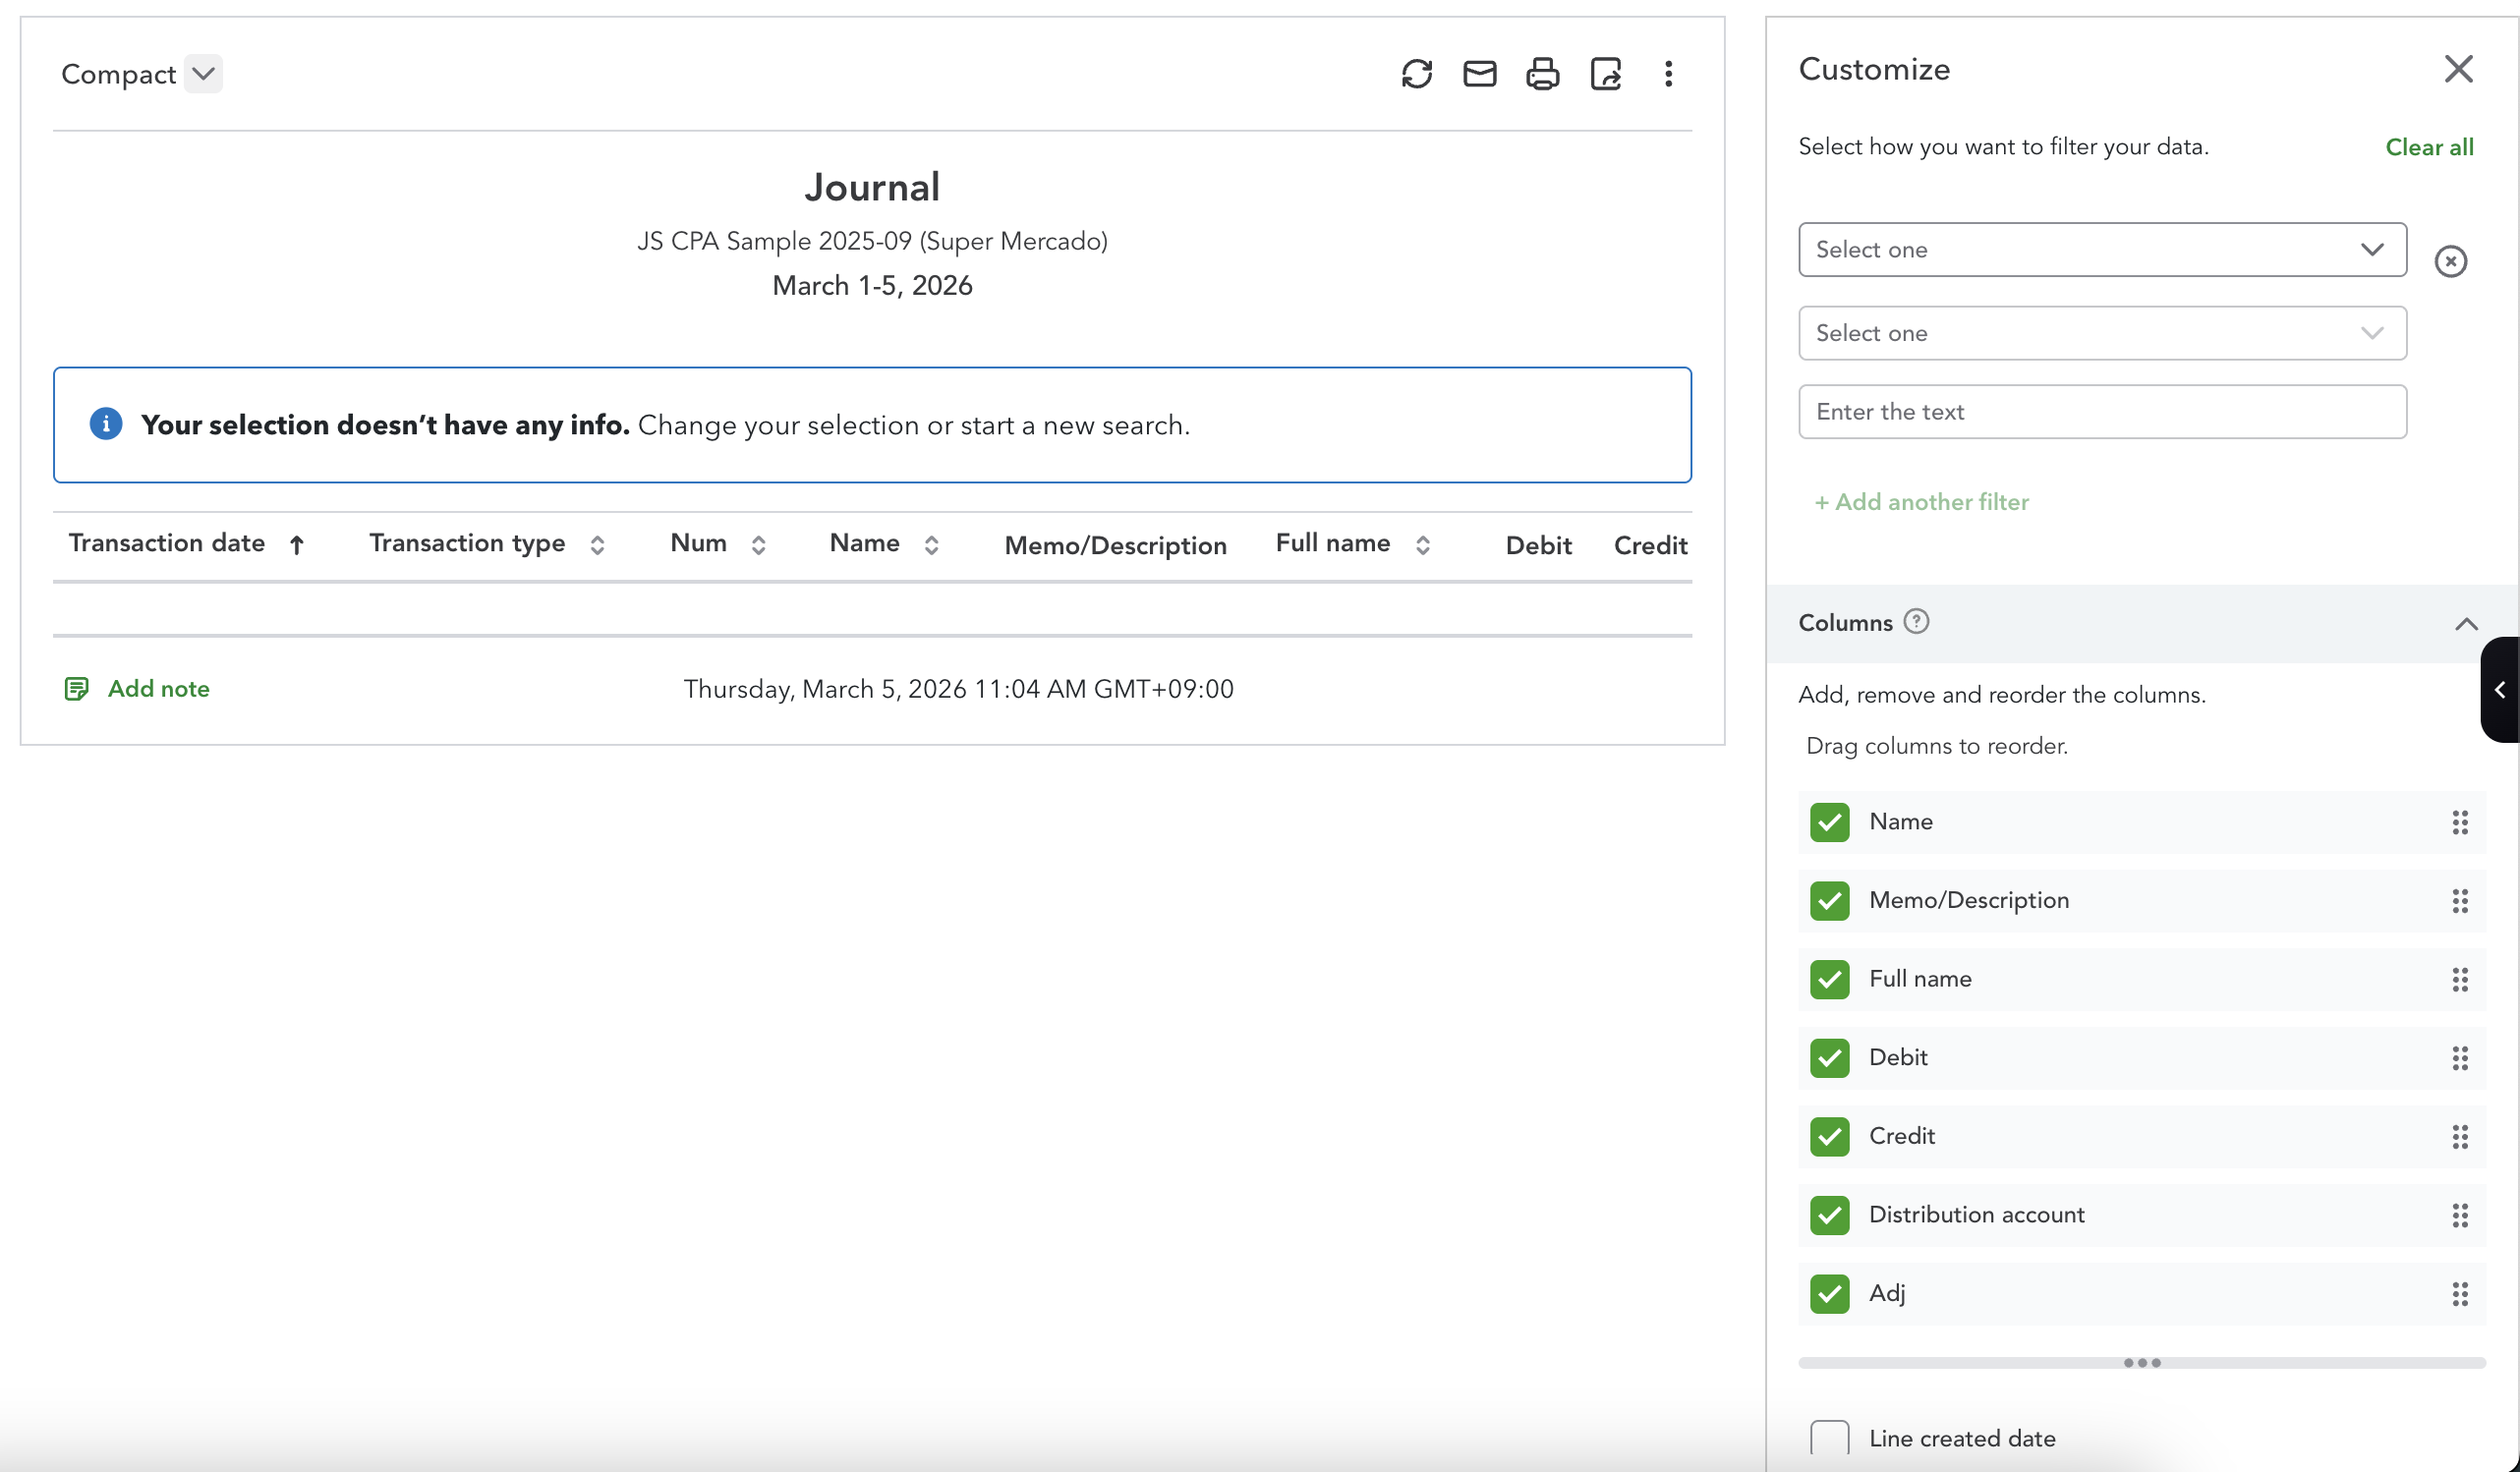
-
Set period from
1901-01-01 ~ end date of your journal -
Click Export to Excel.
Pro-Tip: Date Ranges and Data Limits
There is no limit to the period of data you can import into Wesley.
- Import Everything at Once: You can export your entire history from QuickBooks Online in one go.
- No Need to Split Files: You do not need to break your data down by year or specific periods; Wesley is designed to handle multiple years of data in a single import.
Phase 3: Importing to Wesley
Now that you have your files ready, follow these steps to bring your data into Wesley.
- Open the specific Client file in Wesley where you want to import the data.
- Navigate to the Journal Entries page.
- Click Import and select Import from QuickBooks Online.
- Upload both your Chart of Accounts and Journal files.
- Once the uploads are complete, the Import button will become active. Click it to finalize the process.
Success! You should see a confirmation message within a few seconds.
Need Help?
If you encounter any errors or the data doesn't look quite right, please reach out to the Wesley Support Team for immediate assistance.
Choose your workflow
Import bank statements into QuickBooks Online
Use a PDF-first workflow that ends in a QBO-ready CSV for QuickBooks Online.
Bank statement to QBO
Convert statement PDFs into a QBO-ready CSV.
Bank statement conversion hub
The full cluster for PDF, CSV, OCR, and review-first statement workflows.
Import bank statements into QuickBooks Online
QBO upload path for PDF, image, QBO, QFX, and CSV statement files.
Convert a bank statement PDF to CSV for free
Best for one-off statement cleanup and quick spreadsheet-ready exports.
Coverage and resources
Open the authority pages that support this workflow.
QuickBooks Online Statement Import Prep
Use Wesley before QuickBooks Online when the source file is still a PDF statement, scanned statement, or messy CSV that needs review before import.
Open page →
Supported imports
See the downstream accounting destinations Wesley supports after review.
Open page →
QBO Import Prep Checklist
A QuickBooks Online import prep checklist for reviewers who want to confirm statement-derived files are clean before they hit the QBO bank import flow.
Open page →
Ready to use the matching workflow?
Import bank statements into QuickBooks Online
Use a PDF-first workflow that ends in a QBO-ready CSV for QuickBooks Online.
Related reads
Discover adjacent articles without being sent to near-duplicate topics.