How to Categorize Bank Transactions with AI Without Losing Reviewer Control

Mastering Transactions
If you are trying to categorize bank transactions with AI, the goal is not to let software post blindly. The goal is to let AI do the repetitive pattern-matching work while your reviewer stays focused on the transactions that are ambiguous, policy-sensitive, or financially material.
Quick answer
AI categorization works best when:
- the input rows are already clean
- the chart of accounts is specific enough to be useful
- prior categorization patterns exist
- low-confidence items are easy to review instead of hidden
It works badly when teams try to use categorization to solve the wrong problem first.
If the source data came from a messy PDF statement, clean that first. Start with PDF to CSV for Bank Statements: A Bookkeeper's Guide to Clean, Review-Ready Data in 2026 or the shorter free PDF-to-CSV workflow.
Coverage and resources
Open the authority pages that support this workflow.
Supported banks
See which institutions have dedicated coverage pages and where statement fallback still makes sense.
Open page →
Supported statement types
See which source documents Wesley can clean up before export or import prep.
Open page →
Bank Statement Cleanup SOP for Bookkeepers
A bank statement cleanup SOP for bookkeepers who need a repeatable review process before exporting to QuickBooks, Xero, QIF, or spreadsheet workflows.
Open page →
What AI should do in a bookkeeping workflow
A good AI categorization step should:
- suggest likely accounts based on merchant and memo patterns
- preserve the original transaction details
- flag uncertain rows instead of quietly guessing
- let reviewers fix and override suggestions quickly
- improve the next round of suggestions through feedback
What it should not do is turn categorization into a black box.
What inputs matter most
Before you map anything, make sure these pieces are in place:
| Input | Why it matters |
|---|---|
| Clean transaction rows | AI cannot rescue a broken extraction reliably |
| Clear document type | Statement polarity and payment logic depend on it |
| A usable chart of accounts | Over-broad COAs produce fuzzy categorization |
| Merchant context when needed | "Stripe", "Amazon", and "Transfer" often need more than pattern matching |
| A reviewer path for exceptions | High-confidence and low-confidence items should not take the same amount of attention |
Step-by-step in Wesley
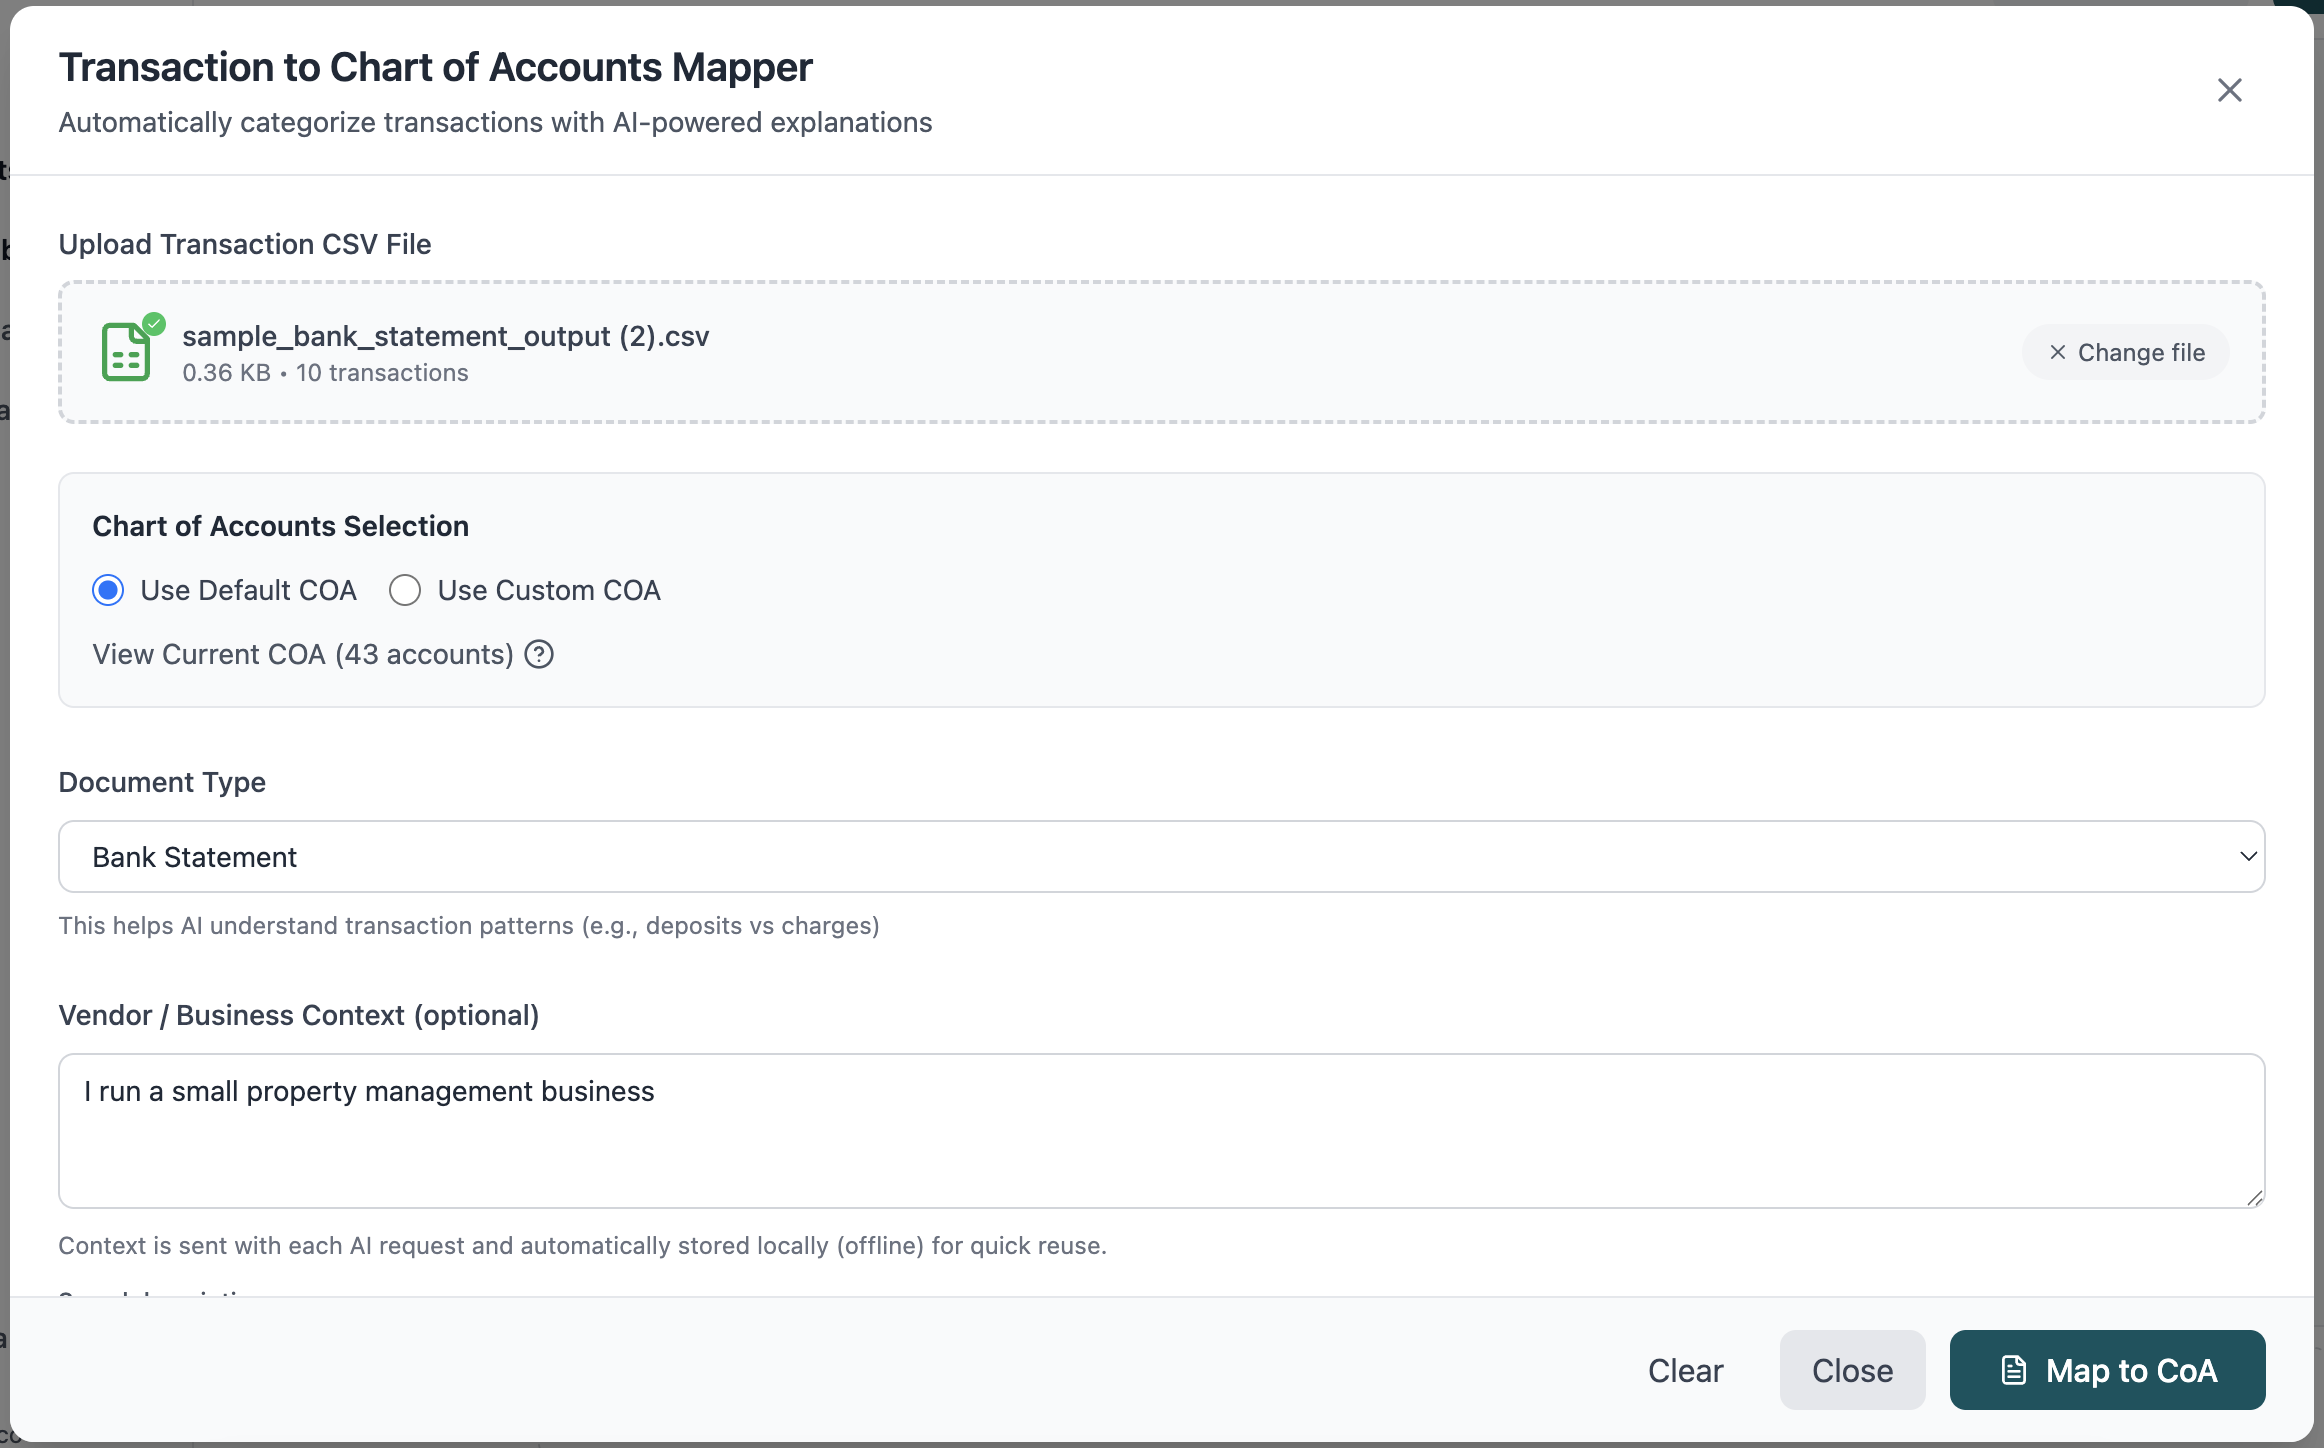
1. Start with a clean input file
You can upload CSV and other structured transaction exports into Wesley, but the strongest results come when the input has already been normalized. If the source was originally a PDF statement, do the conversion and review first.
2. Provide context about the document
This is where teams often save or lose accuracy. If the file is a bank statement, credit card export, PayPal file, or another source, tell the system that up front. Document type changes how amounts and descriptions should be interpreted.
3. Map against the right chart of accounts
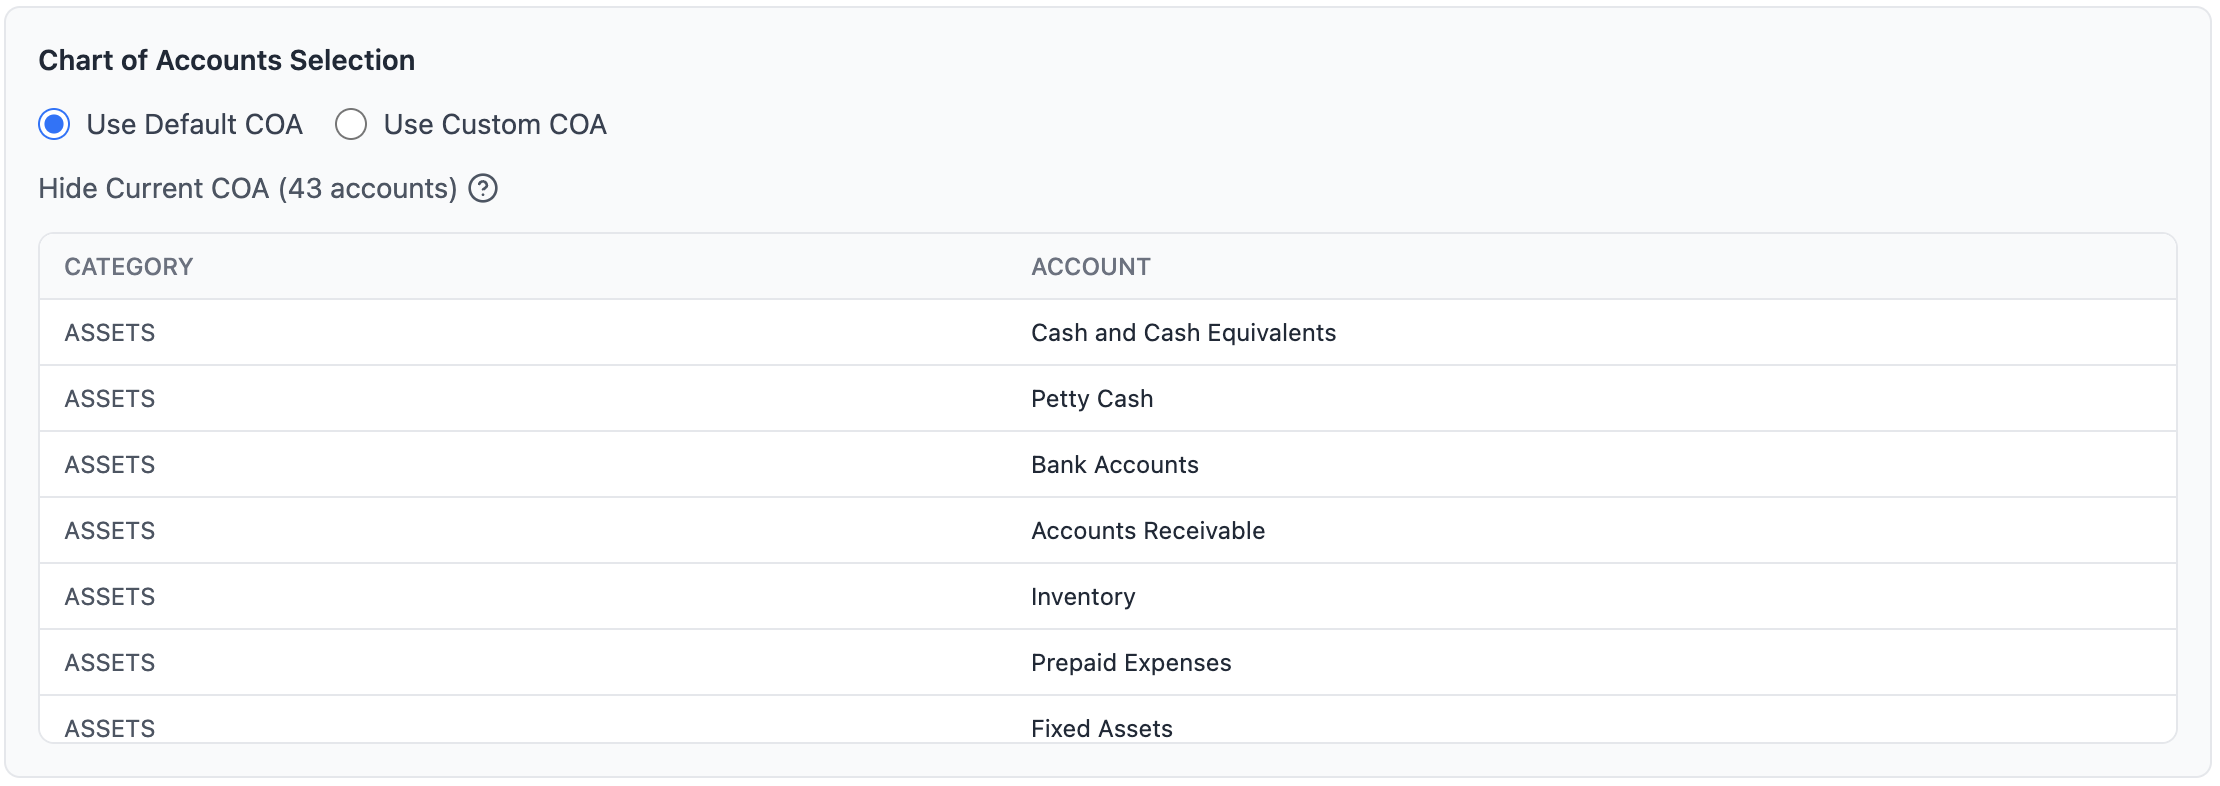
AI can only suggest accounts from the menu you give it. If the COA is too broad, the result is broad guesses. If the COA reflects how your firm actually reviews transactions, suggestions become far more useful.
4. Review the low-confidence and edge-case rows
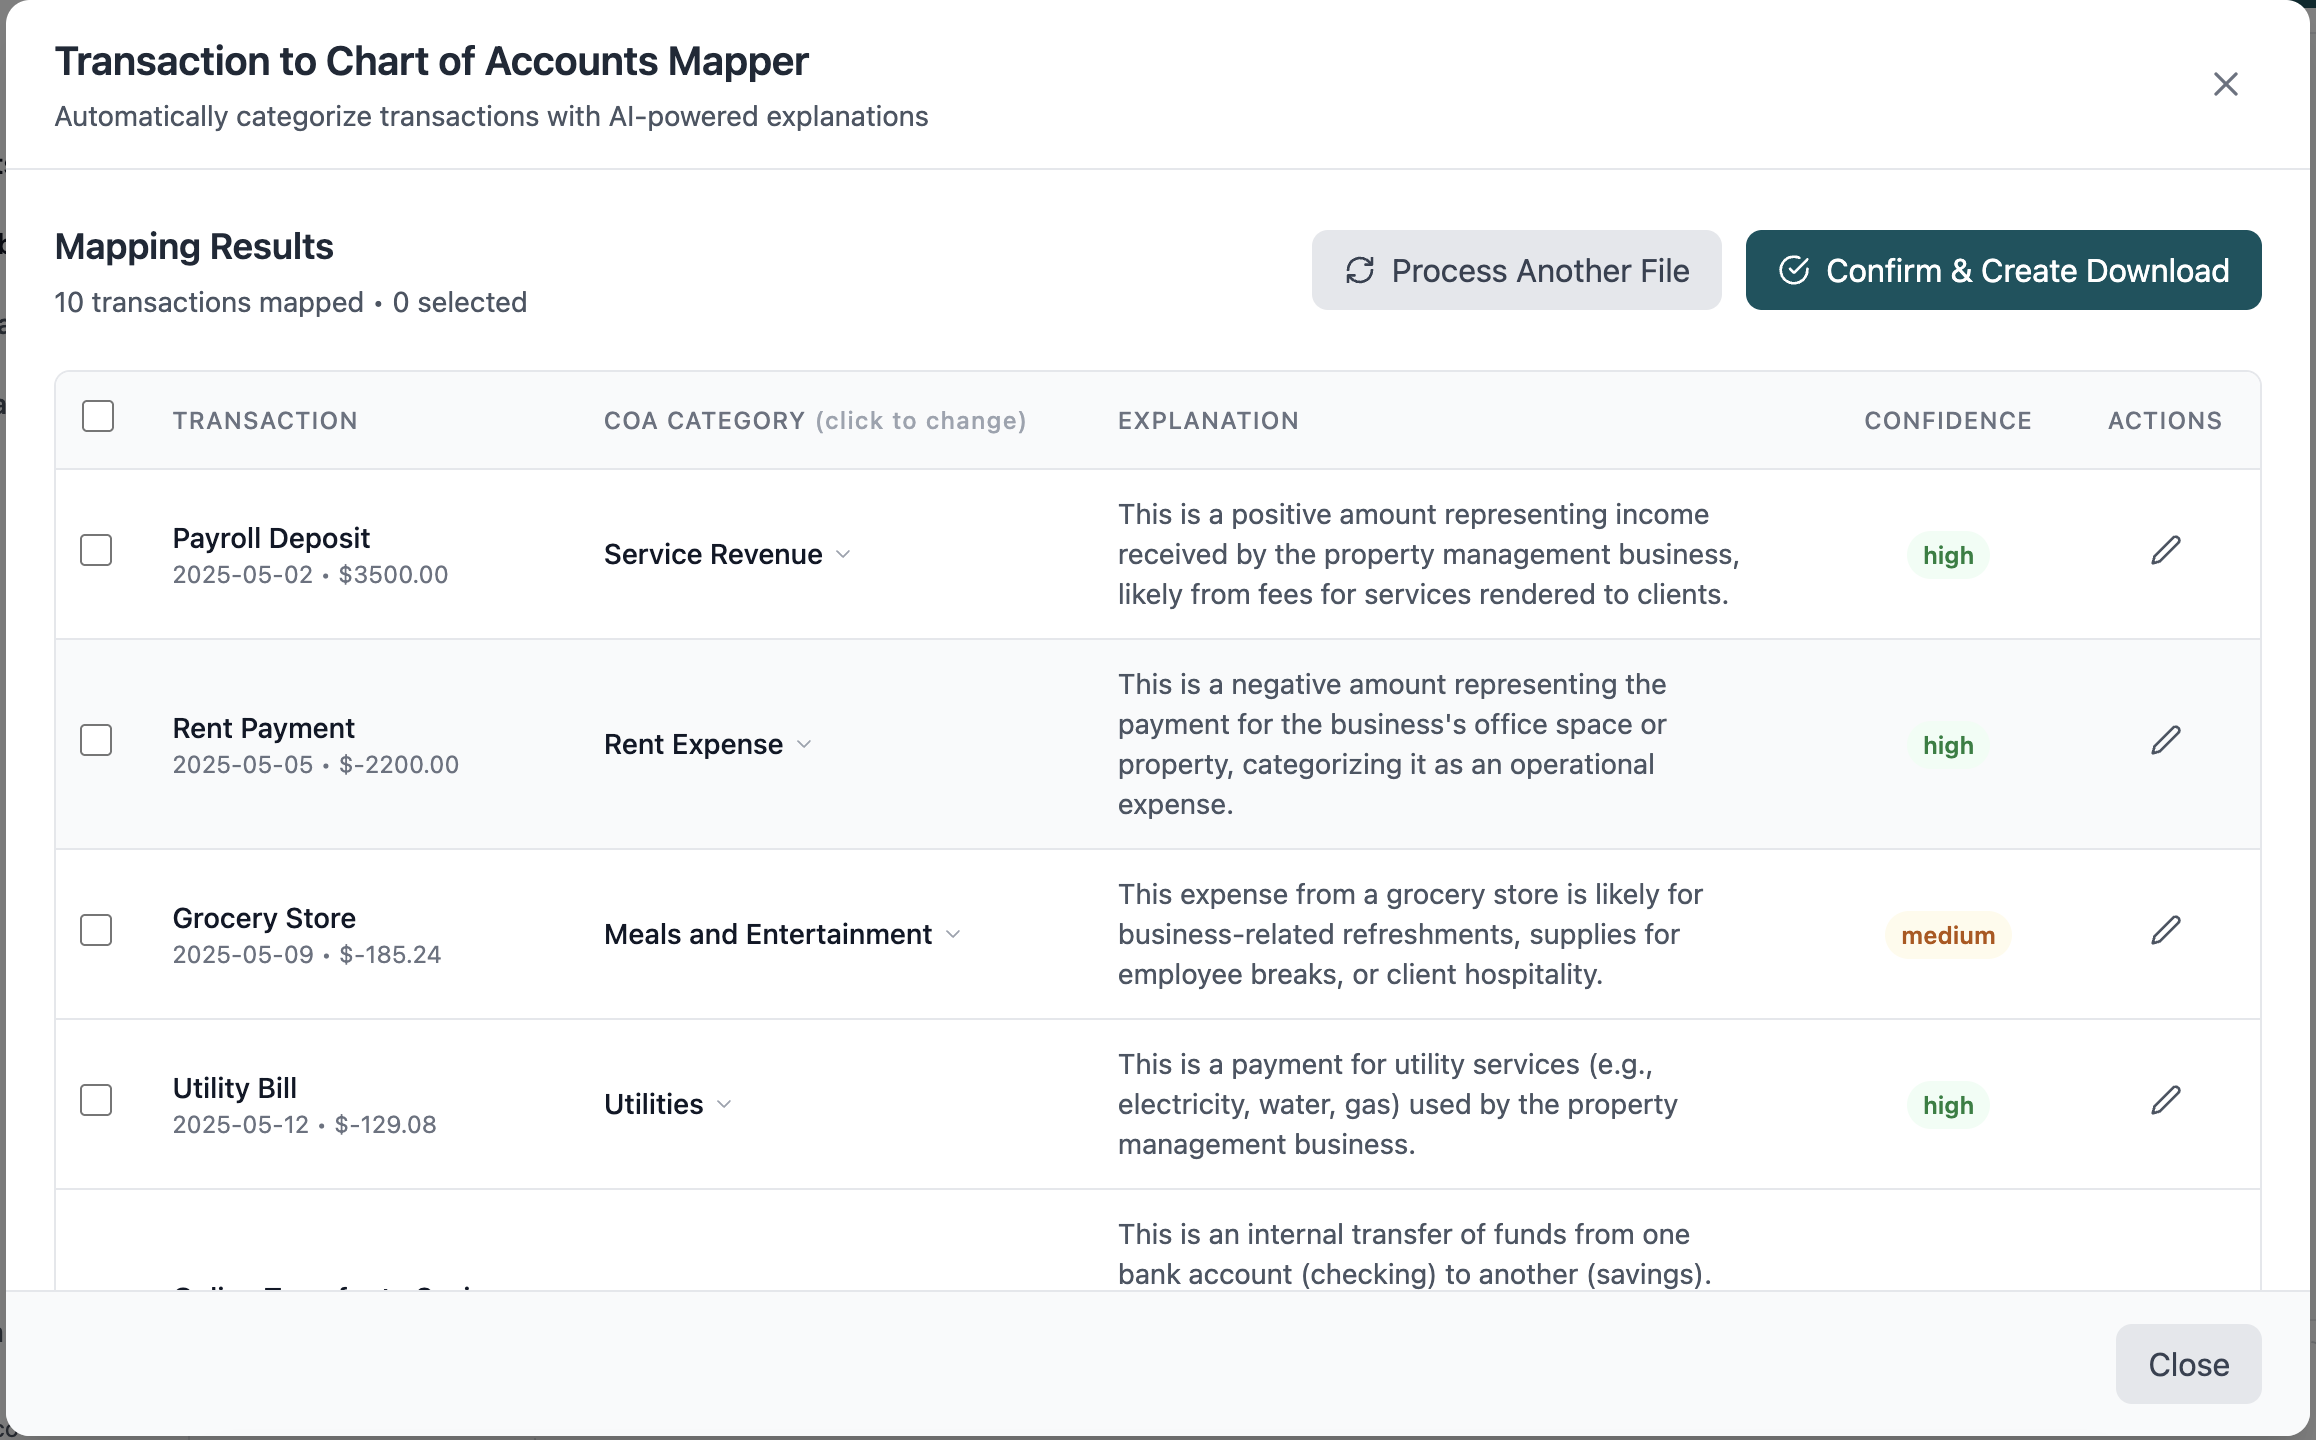
This is the difference between "AI that feels magical for a demo" and "AI that actually helps close the books."
The rows that need human review are usually:
- new merchants
- transfers that look like expenses
- split-like activity hidden inside a single line
- ambiguous subscription or SaaS vendors
- industry-specific transactions with weak memo text
5. Keep the reviewer in control
The best workflow is not "approve everything in bulk." It is:
- clear the obvious rows fast
- isolate exceptions
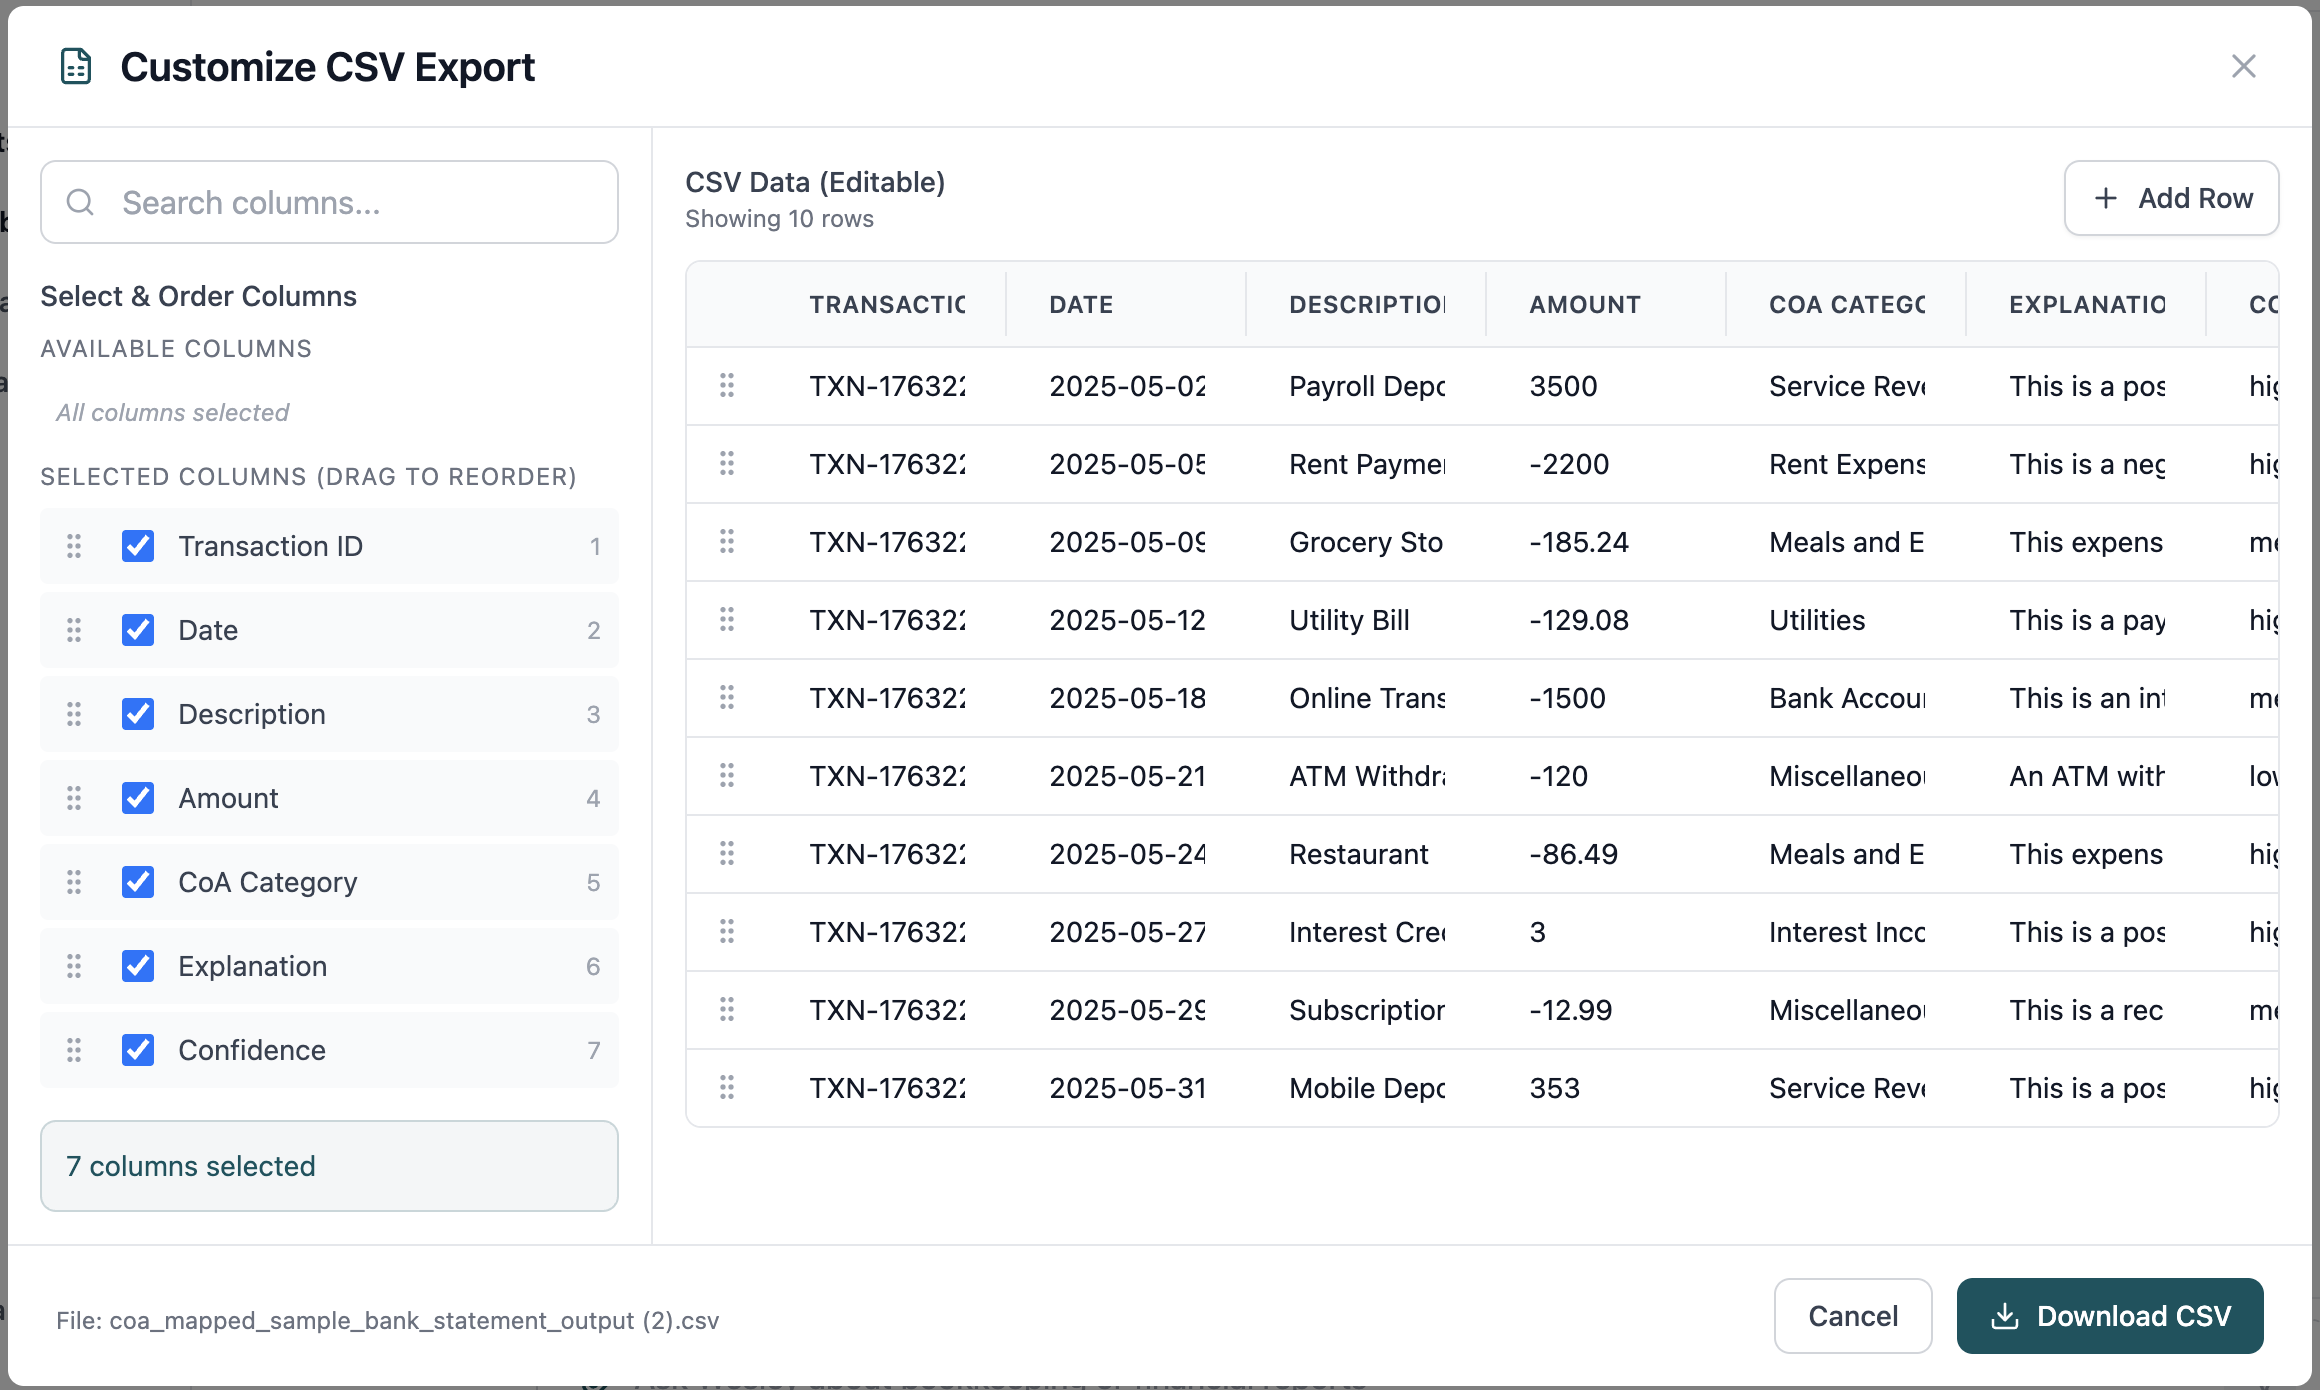
- preserve overrides visibly
- move the reviewed output downstream with confidence
Where teams go wrong
The most common failure modes are operational, not technical:
- they start categorization before cleaning imported rows
- they let the system guess from an overly generic COA
- they mix document types in one batch
- they review only after posting instead of before
- they optimize for speed and then re-open the same exceptions later during close
If the root problem is broken source data, do not expect categorization to fix it. Use the conversion and import guides first:
Where Wesley fits best
Wesley is strongest when the team wants one workflow that connects:
- statement or document preparation
- transaction review
- AI-assisted categorization
- exception handling
- the next bookkeeping step
That is different from a point solution that only predicts accounts. It is much closer to a reviewer-centered bookkeeping workflow.
If that is the problem you are solving, look at Wesley's bookkeeping product or start free.
FAQ
Can AI categorize transactions accurately?
Yes, when the input is clean and the review path is explicit. Accuracy drops fast when the source rows are broken or the chart of accounts is too vague.
Should I use AI before or after statement import cleanup?
After cleanup. Clean rows first, categorize second.
What if my real problem is PDF statements, not categorization?
Start with the PDF-to-CSV guide, then come back to categorization once the rows are trustworthy.
Final takeaway
The right way to categorize bank transactions with AI is not to remove the reviewer. It is to remove the reviewer from the repetitive work and concentrate their attention where accounting judgment actually matters.
If you want to test that workflow end to end, open Wesley's bookkeeping workspace, see pricing, or create a free account.
Want faster review loops?
Test AI-assisted categorization without losing reviewer control
Use Wesley to surface suggested accounts, confidence signals, and manual overrides in one place so your team can move faster without blind posting.
Related reads
Discover adjacent articles without being sent to near-duplicate topics.

Best AI Document Processing Software for Accounting Firms in 2026: Capture, Extraction, and Review-Ready Work

Transaction Categorization Accuracy: How to Review AI-Suggested Accounts Faster at Month-End
